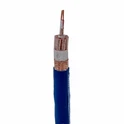
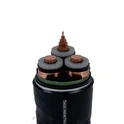
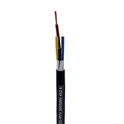
Hey there! As a supplier of Armoured YJV Cable, I've seen firsthand how crucial it is to install these cables correctly. A proper installation not only ensures the cable's long - term performance but also guarantees the safety of the entire electrical system. So, let's dive into the steps of correctly installing Armoured YJV Cable.
Preparation Before Installation
First things first, you gotta do some prep work. Check the cable thoroughly before you start the installation. Look for any visible damages like cuts, abrasions, or dents on the cable sheath. Even a small nick can lead to big problems later, such as moisture ingress, which can severely affect the cable's insulation performance.
Also, make sure you have all the necessary tools on hand. You'll need cable cutters, insulation strippers, crimping tools, and a torque wrench for tightening bolts. And don't forget personal protective equipment (PPE), like safety glasses and gloves. Safety should always be your top priority.


Another important aspect is to measure the installation route accurately. You need to know exactly how much cable you'll need. It's better to have a little extra than to run short in the middle of the installation. And while measuring, take note of any obstacles or sharp edges along the route. These can damage the cable during installation or in the long run.
Cable Routing
Once you're done with the prep, it's time to start routing the cable. When routing Armoured YJV Cable, try to keep it away from heat sources, sharp objects, and areas prone to mechanical damage. If you're running the cable through conduits, make sure the conduits are clean and free of debris. Any dirt or sharp edges inside the conduit can scratch the cable sheath.
For vertical runs, use cable supports at regular intervals. This prevents the cable from sagging and reduces stress on the cable joints. In horizontal runs, avoid sharp bends. The minimum bending radius for Armoured YJV Cable is usually specified by the manufacturer. Bending the cable beyond this radius can damage the internal conductors and insulation.
Cable Termination
Cable termination is a critical step in the installation process. There are two main types of terminations: indoor and outdoor. For indoor terminations, you can use cold - shrink or heat - shrink terminations. Cold - shrink terminations are easier to install and don't require a heat source, which makes them a great choice for many indoor applications.
When terminating the cable, start by stripping the outer armor and the inner sheath carefully. Use the insulation strippers to remove the insulation from the conductors. Make sure not to nick the conductors during this process. After stripping, clean the conductors with a suitable cleaning agent to remove any dirt or oxidation.
Next, install the termination kit according to the manufacturer's instructions. This usually involves sliding the pre - formed components over the conductors and securing them in place. For heat - shrink terminations, use a heat gun to shrink the components tightly around the conductors. Make sure to apply heat evenly to avoid any air pockets or uneven shrinkage.
For outdoor terminations, you need to use terminations that are weather - resistant. These terminations are designed to protect the cable from moisture, UV rays, and other environmental factors. Follow the same steps as for indoor terminations, but pay extra attention to sealing the termination to prevent water ingress.
Cable Jointing
If you need to join two lengths of Armoured YJV Cable, cable jointing is the way to go. Just like terminations, there are different types of cable joints, such as straight - through joints and branch joints.
Before jointing, prepare the cable ends by stripping the outer armor and inner sheath. Then, align the conductors of the two cables carefully. Use a crimping tool to connect the conductors. Make sure the crimp is tight and secure. You can use a torque wrench to ensure the correct crimping force.
After crimping the conductors, install the jointing kit. This kit usually includes insulation materials and a protective outer layer. Apply the insulation materials around the conductors and the joint area. Then, install the outer protective layer to seal the joint. Just like with terminations, follow the manufacturer's instructions carefully.
Testing
Once the installation is complete, it's essential to test the cable. You can use a megger to test the insulation resistance of the cable. A high insulation resistance indicates that the cable's insulation is in good condition. You should also test the continuity of the conductors to make sure there are no breaks in the circuit.
If the cable is part of a larger electrical system, you may need to perform more comprehensive tests, such as partial discharge tests. These tests can detect any potential issues with the cable insulation that may not be apparent during a simple insulation resistance test.
Conclusion
Installing Armoured YJV Cable correctly is a multi - step process that requires careful planning, proper tools, and attention to detail. By following these steps, you can ensure that your cable installation is safe, reliable, and long - lasting.
If you're in the market for high - quality Armoured YJV Cable, we've got you covered. We offer a wide range of cables, including 0.6 - 1kv YJV Cable and Cu Xlpe Pvc Swa Cable. Our 0.6 - 1kv YJV Cable is known for its excellent performance and durability.
If you have any questions about cable installation or if you're interested in purchasing our cables, feel free to reach out. We're always happy to help you with your electrical cable needs. Let's work together to ensure your electrical systems are running smoothly!
References
- Electrical Installation Handbook, Schneider Electric
- Cable Installation Guidelines, Various Cable Manufacturers