How to install Copper Conductor YJV Cable in a conduit?
As a seasoned supplier of Copper Conductor YJV Cable, I've witnessed firsthand the importance of proper installation. A well - installed cable not only ensures optimal performance but also extends the lifespan of the electrical system. In this blog, I'll guide you through the process of installing Copper Conductor YJV Cable in a conduit.


Understanding Copper Conductor YJV Cable
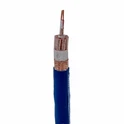
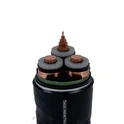
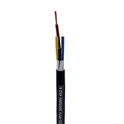
Before diving into the installation process, it's crucial to understand what Copper Conductor YJV Cable is. The "YJV" stands for cross - linked polyethylene (XLPE) insulated, PVC sheathed power cable. The copper conductor offers excellent electrical conductivity, making it a popular choice for various electrical applications. We offer a wide range of YJV cables, including 4 C Xlpe Swa Pvc Cu Cable, Armoured YJV Cable, and Low Voltage YJV Cable. Each type is designed to meet specific requirements, whether it's for industrial, commercial, or residential use.
Pre - installation Preparations
- Inspect the Cable and Conduit
- First, carefully examine the Copper Conductor YJV Cable for any visible damage, such as cuts, abrasions, or kinks. If any damage is found, it's essential to replace the cable to prevent future electrical problems.
- Next, inspect the conduit. The conduit should be clean, free of debris, and have a smooth interior to allow the cable to pass through easily. Check for any sharp edges or bends that could damage the cable during installation.
- Measure and Plan
- Measure the length of the conduit to determine the amount of cable needed. It's advisable to add a little extra length to account for any unexpected turns or connections.
- Plan the route of the cable through the conduit. Avoid sharp bends and ensure that the cable can be pulled through without excessive force. Consider the location of junction boxes, switches, and outlets to ensure proper cable routing.
- Gather Tools and Equipment
- You'll need a variety of tools for the installation, including cable pullers, lubricants, cable cutters, and measuring tapes. Cable pullers are used to pull the cable through the conduit, while lubricants reduce friction and make the pulling process easier. Cable cutters are essential for cutting the cable to the correct length.
Installing the Conduit
- Mount the Conduit
- Secure the conduit in place using appropriate mounting brackets. The brackets should be spaced at regular intervals to ensure the conduit is stable. Make sure the conduit is level and aligned correctly to facilitate smooth cable installation.
- Make Bends
- If the conduit needs to be bent, use a conduit bender. When making bends, follow the manufacturer's guidelines to ensure the bend radius is within the acceptable range. A proper bend radius prevents damage to the cable and ensures efficient cable pulling.
Pulling the Cable through the Conduit
- Apply Lubricant
- Before pulling the cable, apply a suitable lubricant to the inside of the conduit. This reduces friction between the cable and the conduit walls, making it easier to pull the cable through. Make sure to use a lubricant that is compatible with the cable insulation and the conduit material.
- Attach the Cable to the Pulling Device
- Use a cable pulling grip to attach the cable to the pulling device, such as a cable puller or a winch. Ensure that the grip is securely attached to the cable to prevent it from slipping during the pulling process.
- Pull the Cable
- Start pulling the cable slowly and steadily. Have someone at the other end of the conduit to guide the cable and ensure it is not getting stuck. If the cable encounters resistance, stop pulling and check for any obstructions or kinks in the conduit.
Terminating the Cable
- Prepare the Cable Ends
- Once the cable is pulled through the conduit, cut the cable to the appropriate length. Strip the outer sheath and insulation from the cable ends using cable strippers. Be careful not to damage the copper conductors during the stripping process.
- Install Termination Accessories
- Depending on the application, you may need to install termination accessories such as cable lugs, connectors, or splices. Follow the manufacturer's instructions for installing these accessories to ensure proper electrical connections.
- Test the Cable
- After terminating the cable, perform electrical tests to ensure that the cable is functioning correctly. Use a multimeter to check for continuity, insulation resistance, and other electrical parameters. If any issues are detected, troubleshoot and correct them before putting the system into operation.
Safety Considerations
- Electrical Safety
- Always work in a de - energized electrical system to avoid the risk of electric shock. Before starting any work, turn off the power at the main switch and lock it out to prevent accidental re - energization.
- Physical Safety
- Wear appropriate personal protective equipment (PPE), such as safety glasses, gloves, and hard hats. When using tools and equipment, follow the safety instructions provided by the manufacturer.
- Environmental Safety
- Dispose of any waste materials, such as cable scraps and packaging, in an environmentally friendly manner. Avoid using chemicals or lubricants that are harmful to the environment.
Conclusion
Installing Copper Conductor YJV Cable in a conduit requires careful planning, proper tools, and strict adherence to safety procedures. By following the steps outlined in this blog, you can ensure a successful installation that provides reliable electrical performance. As a supplier of high - quality Copper Conductor YJV Cable, we are committed to providing you with the best products and technical support. If you have any questions about cable selection, installation, or any other electrical needs, please don't hesitate to contact us for further discussions and potential procurement opportunities.
References
- Electrical Installation Handbook, Schneider Electric
- National Electrical Code (NEC)