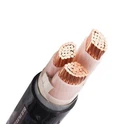
Installing electrical wire in a garage can be a rewarding DIY project that enhances the functionality and safety of your space. As an electrical wire supplier, I've witnessed firsthand the transformative power of a well-wired garage. In this blog post, I'll guide you through the process of installing electrical wire in a garage, from planning to completion.
Planning Your Electrical Installation
Before you start any electrical work, it's crucial to plan your installation carefully. This involves determining your power needs, choosing the right type of wire, and creating a layout for your electrical system.
Determine Your Power Needs
The first step in planning your electrical installation is to determine your power needs. Consider the appliances and tools you'll be using in your garage, such as a refrigerator, freezer, power tools, and lighting fixtures. Make a list of these items and note their power requirements in watts.
Once you have a list of your appliances and tools, you can calculate the total power demand for your garage. Add up the wattage of all the items on your list to get the total wattage. Divide the total wattage by the voltage of your electrical system (usually 120 or 240 volts) to get the total amperage.
For example, if you have a refrigerator that uses 500 watts, a freezer that uses 300 watts, a power drill that uses 800 watts, and a lighting fixture that uses 100 watts, the total wattage is 1700 watts. If your electrical system is 120 volts, the total amperage is 1700 / 120 = 14.17 amps.
Choose the Right Type of Wire
Once you've determined your power needs, you can choose the right type of wire for your installation. There are several types of electrical wire available, each with its own characteristics and applications.
- Household Wire: This type of wire is commonly used in residential electrical systems. It consists of two or more insulated conductors wrapped in a protective sheath. Household wire is available in different gauges, with smaller gauges indicating thicker wire and higher ampacity.
- Double Core Pvc Insulated Wire: This type of wire has two conductors insulated with PVC (polyvinyl chloride). It is commonly used for indoor wiring applications, such as lighting and outlets.
- Cross Linked Polyethylene Wire: This type of wire has a cross-linked polyethylene insulation, which provides excellent resistance to heat, moisture, and chemicals. It is commonly used in outdoor and underground wiring applications.
When choosing the right type of wire for your installation, consider the following factors:


- Ampacity: The ampacity of the wire refers to the maximum amount of current it can safely carry. Choose a wire with an ampacity that is greater than or equal to the total amperage of your electrical system.
- Voltage Rating: The voltage rating of the wire refers to the maximum voltage it can safely handle. Choose a wire with a voltage rating that is equal to or greater than the voltage of your electrical system.
- Insulation Type: The insulation type of the wire affects its resistance to heat, moisture, and chemicals. Choose a wire with an insulation type that is suitable for the environment in which it will be installed.
Create a Layout for Your Electrical System
Once you've chosen the right type of wire for your installation, you can create a layout for your electrical system. This involves determining the location of your outlets, switches, and lighting fixtures, as well as the route of your electrical wires.
When creating a layout for your electrical system, consider the following factors:
- Accessibility: Make sure your outlets, switches, and lighting fixtures are easily accessible. Avoid placing them in areas where they may be blocked by furniture or other objects.
- Safety: Make sure your electrical wires are installed in a safe manner. Avoid running them through areas where they may be damaged, such as near sharp edges or in areas prone to flooding.
- Functionality: Make sure your electrical system is designed to meet your specific needs. Consider the location of your appliances and tools, as well as the type of lighting you want to use.
Gathering Your Tools and Materials
Once you've planned your electrical installation, it's time to gather your tools and materials. Here's a list of the tools and materials you'll need:
- Electrical Wire: Choose the right type and gauge of wire for your installation.
- Electrical Boxes: Use electrical boxes to house your outlets, switches, and junction points.
- Outlet and Switch Covers: Use outlet and switch covers to protect your electrical components.
- Wire Connectors: Use wire connectors to join your electrical wires together.
- Cable Clamps: Use cable clamps to secure your electrical wires to the framing of your garage.
- Fish Tape: Use fish tape to pull your electrical wires through walls and ceilings.
- Wire Strippers: Use wire strippers to remove the insulation from your electrical wires.
- Pliers: Use pliers to bend and twist your electrical wires.
- Screwdriver: Use a screwdriver to install your electrical boxes, outlets, and switches.
- Voltage Tester: Use a voltage tester to test for the presence of electricity before working on your electrical system.
Installing Your Electrical Wire
Once you've gathered your tools and materials, it's time to install your electrical wire. Here's a step-by-step guide to help you through the process:
Step 1: Turn Off the Power
Before you start any electrical work, it's crucial to turn off the power to your garage at the main electrical panel. This will prevent you from getting shocked or electrocuted.
Step 2: Install Your Electrical Boxes
Install your electrical boxes at the locations you've determined in your layout. Use a screwdriver to attach the boxes to the framing of your garage. Make sure the boxes are level and secure.
Step 3: Run Your Electrical Wire
Run your electrical wire from the main electrical panel to the locations of your outlets, switches, and lighting fixtures. Use cable clamps to secure the wire to the framing of your garage. Make sure the wire is straight and free of kinks.
Step 4: Pull Your Electrical Wire Through Walls and Ceilings
If you need to run your electrical wire through walls or ceilings, use fish tape to pull the wire through. Start by inserting the fish tape into the wall or ceiling at one end. Then, use a long, thin object to guide the fish tape through the wall or ceiling to the other end. Once the fish tape has reached the other end, attach the electrical wire to the end of the fish tape and pull the wire through the wall or ceiling.
Step 5: Connect Your Electrical Wires
Once you've run your electrical wire to the locations of your outlets, switches, and lighting fixtures, it's time to connect the wires. Use wire connectors to join the wires together. Make sure the connections are tight and secure.
Step 6: Install Your Outlets, Switches, and Lighting Fixtures
Install your outlets, switches, and lighting fixtures in the electrical boxes. Use a screwdriver to attach the devices to the boxes. Make sure the devices are level and secure.
Step 7: Test Your Electrical System
Once you've installed your outlets, switches, and lighting fixtures, it's time to test your electrical system. Turn on the power to your garage at the main electrical panel. Use a voltage tester to test for the presence of electricity at each outlet, switch, and lighting fixture. Make sure the devices are working properly.
Safety Tips
Installing electrical wire in a garage can be a dangerous task. Here are some safety tips to help you stay safe:
- Turn Off the Power: Before you start any electrical work, make sure the power to your garage is turned off at the main electrical panel.
- Use Proper Tools and Equipment: Use the right tools and equipment for the job. Make sure your tools are in good condition and are rated for the voltage and amperage of your electrical system.
- Wear Protective Gear: Wear protective gear, such as safety glasses, gloves, and a hard hat, to protect yourself from injury.
- Follow Electrical Codes and Regulations: Make sure your electrical installation complies with all local electrical codes and regulations.
- Get Professional Help if Needed: If you're not comfortable working with electricity, or if you're unsure about any aspect of your electrical installation, get professional help.
Conclusion
Installing electrical wire in a garage can be a challenging but rewarding DIY project. By following the steps outlined in this blog post, you can install your electrical wire safely and effectively. Remember to plan your installation carefully, choose the right type of wire, and follow all safety tips and electrical codes and regulations.
If you have any questions or need further assistance with your electrical installation, please don't hesitate to contact us. We're a leading electrical wire supplier, and we're here to help you with all your electrical needs. Whether you're looking for high-quality Household Wire, Double Core Pvc Insulated Wire, or Cross Linked Polyethylene Wire, we've got you covered. Contact us today to discuss your requirements and start your project on the right foot.
References
- National Electrical Code (NEC)
- Electrical Wiring for Dummies by Steve Snyder
- Wiring a House by Carlton Bale