Hey there! As a supplier of Low Voltage YJV Cable, I've seen my fair share of folks scratching their heads over how to install these cables properly. So, I thought I'd put together this blog to walk you through the whole process. Whether you're a DIY enthusiast or a professional electrician, this guide should come in handy.
What is Low Voltage YJV Cable?
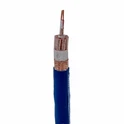
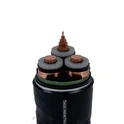
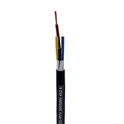
Before we jump into the installation process, let's quickly talk about what Low Voltage YJV Cable is. YJV stands for cross-linked polyethylene insulated PVC sheathed power cable. It's widely used in low-voltage power distribution systems because it's durable, flexible, and has good electrical performance. You can find different types of these cables on our website, like the 4 C 75sqmm Cu AWG Cable, 0.6-1kv YJV Cable, and 6 mm Cable Single Core Xlpe.
Tools and Materials You'll Need
First things first, you gotta gather all the tools and materials you'll need for the installation. Here's a basic list:


- Cable cutter or knife
- Insulation stripper
- Screwdriver set
- Electrical tape
- Cable clips or ties
- Voltage tester
- Heat shrink tubing (optional)
- Of course, the Low Voltage YJV Cable itself
Step 1: Planning and Preparation
Before you start cutting and connecting cables, you need to have a clear plan. Here's what you should do:
- Measure the distance: Figure out how much cable you'll need to run from the power source to the destination. Add a little extra length to account for any bends or turns.
- Check the route: Look for any obstacles or hazards along the route where you'll be running the cable. Make sure there are no sharp edges or objects that could damage the cable.
- Turn off the power: This is crucial for your safety. Before you start working on the cable, turn off the power at the main switch or breaker. Use a voltage tester to double-check that the power is off.
Step 2: Cable Installation
Now that you're all set up, it's time to install the cable. Here's how:
- Lay the cable: Start at the power source and carefully lay the cable along the planned route. Use cable clips or ties to secure the cable at regular intervals. Make sure the cable is straight and doesn't have any kinks or twists.
- Cut the cable: Once you've laid the cable to the destination, use a cable cutter or knife to cut the cable to the appropriate length. Be careful not to cut yourself or damage the cable.
- Strip the insulation: Use an insulation stripper to remove about 1-2 inches of insulation from the ends of the cable. This will expose the conductors.
- Connect the cables: Depending on your application, you may need to connect the cable to other cables, electrical devices, or terminals. Make sure you follow the manufacturer's instructions and use the appropriate connectors. For example, if you're connecting the cable to a terminal block, use a screwdriver to tighten the screws securely.
- Insulate the connections: After you've made the connections, wrap electrical tape around the exposed conductors to insulate them. You can also use heat shrink tubing for a more professional and secure finish. Just make sure you heat the tubing evenly with a heat gun until it shrinks and seals around the connection.
Step 3: Testing and Final Checks
Once you've installed the cable, it's time to test it and make sure everything is working properly. Here's what you should do:
- Turn on the power: After you've completed all the connections and insulation, turn on the power at the main switch or breaker. Use a voltage tester to check that there is power at the destination.
- Check for continuity: Use a multimeter to check the continuity of the cable. This will ensure that there are no breaks or shorts in the conductors.
- Inspect the installation: Take a close look at the cable installation to make sure everything is secure and properly insulated. Check for any signs of damage or loose connections.
- Test the electrical device: If you've connected the cable to an electrical device, test the device to make sure it's working properly.
Step 4: Maintenance and Safety Tips
Installing Low Voltage YJV Cable is just the first step. To ensure the long-term performance and safety of your electrical system, you need to follow these maintenance and safety tips:
- Regular inspections: Periodically inspect the cable installation for any signs of damage, wear, or corrosion. Look for frayed insulation, loose connections, or overheating.
- Keep it clean: Keep the cable and its surroundings clean and free of debris. Dirt and dust can accumulate on the cable and cause it to overheat or short circuit.
- Avoid overloading: Make sure you don't overload the cable by connecting too many electrical devices or appliances to it. This can cause the cable to overheat and potentially start a fire.
- Follow the manufacturer's instructions: Always follow the manufacturer's instructions and recommendations for the installation, use, and maintenance of the cable.
Conclusion
Well, there you have it! That's how you install Low Voltage YJV Cable. It may seem like a daunting task at first, but if you follow these steps and take your time, you should be able to do it safely and successfully. If you have any questions or need further assistance, don't hesitate to reach out to us. We're here to help you with all your Low Voltage YJV Cable needs.
Whether you're working on a small DIY project or a large commercial installation, we have the right cable for you. Check out our website to browse our wide selection of 4 C 75sqmm Cu AWG Cable, 0.6-1kv YJV Cable, and 6 mm Cable Single Core Xlpe. If you're interested in purchasing our cables or have any questions about our products, feel free to contact us. We'd love to have a chat with you and discuss your specific requirements.
References
- Electrical Wiring Handbook
- National Electrical Code (NEC)