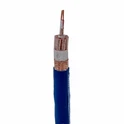
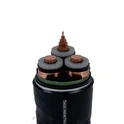
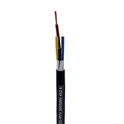
As a seasoned supplier of Low Voltage YJV Cable, I've witnessed firsthand the transformative impact these cables can have on audio - video equipment. In this blog, I'll share a comprehensive guide on how to install Low Voltage YJV Cable in audio - video equipment, ensuring optimal performance and reliability.
Understanding Low Voltage YJV Cable
Before delving into the installation process, it's crucial to understand what Low Voltage YJV Cable is. YJV stands for Cross - linked Polyethylene Insulated PVC Sheathed Power Cable. It is widely used in various electrical applications, including audio - video systems, due to its excellent electrical insulation properties, mechanical strength, and resistance to environmental factors.


We offer a diverse range of Low Voltage YJV Cables, such as 370+235 Xlpe Cable and 6 mm Cable Single Core Xlpe. These cables are designed to meet different power requirements and installation scenarios in audio - video equipment. The 0.6 - 1kv YJV Cable is particularly popular for its stability and safety in low - voltage applications.
Pre - installation Preparations
1. Cable Selection
The first step in the installation process is to select the appropriate cable for your audio - video equipment. Consider factors such as the power requirements of the equipment, the distance between the power source and the equipment, and the environmental conditions where the cable will be installed. For example, if you have high - power audio - video devices, you may need a cable with a larger cross - sectional area to handle the current.
2. Tools and Materials
Gather all the necessary tools and materials before you start the installation. You'll need cable cutters, wire strippers, insulation tape, cable ties, and a voltage tester. Make sure the tools are in good working condition to ensure a smooth installation process.
3. Safety Precautions
Safety should always be your top priority. Before working on any electrical installation, turn off the power supply to the area where you'll be installing the cable. Wear appropriate safety gear, such as insulated gloves and safety glasses, to protect yourself from potential electrical hazards.
Installation Steps
1. Route Planning
Plan the route for the cable carefully. Avoid areas where the cable may be subject to physical damage, such as sharp edges, heavy machinery, or areas with high temperatures. The cable should be installed in a straight line as much as possible to minimize signal loss and interference. Use cable trays or conduits to protect the cable and keep it organized.
2. Cable Cutting
Measure the length of the cable required for the installation and use cable cutters to cut the cable to the appropriate length. Make sure to leave some extra length for connections and future adjustments.
3. Cable Stripping
Use wire strippers to remove the outer insulation of the cable at both ends. Be careful not to damage the inner conductors during the stripping process. The length of the stripped insulation should be appropriate for the connectors or terminals you'll be using.
4. Termination
There are different methods for terminating Low Voltage YJV Cable, such as using crimp connectors or soldering. If you're using crimp connectors, make sure to use the correct size and type of connector for the cable. Insert the stripped conductor into the connector and use a crimping tool to secure the connection. If you choose to solder the connection, apply a small amount of solder to the conductor and the terminal, and use a soldering iron to melt the solder and create a strong bond.
5. Connection to Audio - Video Equipment
Connect the terminated cable to the audio - video equipment. Make sure to follow the manufacturer's instructions for the equipment to ensure proper connection. Check the polarity of the connections to avoid any short - circuits or damage to the equipment.
6. Testing
After the installation is complete, turn on the power supply and use a voltage tester to check if the cable is functioning properly. Check for any signs of overheating, sparking, or abnormal noise. If you encounter any problems, turn off the power immediately and troubleshoot the issue.
Post - installation Checks
1. Insulation Resistance Test
Perform an insulation resistance test on the installed cable using an insulation resistance tester. This test will help you determine if the cable's insulation is intact and if there are any potential leakage currents. A high insulation resistance value indicates a good cable installation.
2. Signal Quality Check
For audio - video applications, check the signal quality of the equipment. Make sure there are no interference, distortion, or loss of signal. If you notice any issues, check the cable connections and the overall installation for any potential problems.
3. Cable Securing
Use cable ties or other securing methods to keep the cable in place and prevent it from moving or being damaged. Make sure the cable is not under any tension or stress, as this can affect its performance over time.
Maintenance and Troubleshooting
1. Regular Inspections
Regularly inspect the installed cable for any signs of wear, damage, or aging. Check the cable connections, insulation, and overall condition. Replace any damaged or worn - out parts immediately to prevent potential failures.
2. Troubleshooting
If you encounter any problems with the audio - video equipment or the cable, follow a systematic troubleshooting process. Start by checking the power supply, cable connections, and the equipment itself. Use a multimeter or other testing equipment to diagnose the problem. If you're unable to resolve the issue, consult a professional electrician.
Conclusion
Installing Low Voltage YJV Cable in audio - video equipment requires careful planning, proper installation techniques, and regular maintenance. By following the steps outlined in this guide, you can ensure a safe and reliable installation that will enhance the performance of your audio - video systems.
As a trusted supplier of Low Voltage YJV Cable, we are committed to providing high - quality products and excellent customer service. If you're interested in purchasing our cables for your audio - video equipment or have any questions about the installation process, please feel free to contact us for further discussions and procurement negotiations.
References
- Electrical Installation Handbook, Various Editions
- Manufacturer's Manuals for Low Voltage YJV Cable and Audio - Video Equipment