Hey there! As an outdoor electrical cable supplier, I often get asked about how to install outdoor electrical cables on a balcony. It's a common project for folks looking to add some extra lighting, power for a small appliance, or maybe even a heated towel rack. In this blog post, I'll walk you through the process step by step, sharing some tips and tricks along the way.


Step 1: Plan Your Installation
Before you start digging into the installation, you need to have a clear plan. First off, figure out what you'll be using the electrical cables for. Are you setting up some string lights? Maybe a small fan? This will help you determine the type and size of the cable you need.
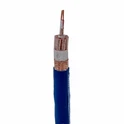
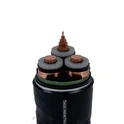
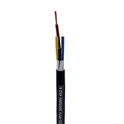
For most balcony setups, an Xlpe Insulation Outdoor Electrical Cable is a great choice. XLPE (Cross-linked Polyethylene) insulation offers excellent protection against moisture, heat, and physical damage, making it perfect for outdoor use.
Next, measure the distance from your power source (usually an indoor outlet) to the area on the balcony where you want to install the cable. This will give you an idea of how much cable you'll need. It's always a good idea to buy a little extra to account for any unexpected turns or adjustments.
Step 2: Gather Your Tools and Materials
Once you have your plan in place, it's time to gather the tools and materials you'll need. Here's a basic list:
- Outdoor electrical cable: As mentioned earlier, an Xlpe Insulation Outdoor Cable is a solid option. You can choose the appropriate size based on your power requirements. For example, if you're powering multiple devices or high-wattage appliances, you might need a 120mm Xlpe Cable.
- Wire strippers: These are essential for removing the insulation from the ends of the cable.
- Electrical tape: Use it to insulate the connections and protect them from the elements.
- Cable clips or conduit: You'll need these to secure the cable along the balcony railing or wall.
- Drill and appropriate bits: If you're going to be mounting the cable clips or conduit.
- Screwdriver: For tightening screws and making connections.
- Voltage tester: This is crucial for ensuring the power is off before you start working and for testing the connections once you're done.
Step 3: Turn Off the Power
Safety first! Before you start working on any electrical project, you need to turn off the power at the circuit breaker. Locate the breaker that controls the outlet you'll be using and switch it to the "off" position. Use a voltage tester to double-check that the power is indeed off.
Step 4: Route the Cable
Now it's time to route the cable from the indoor outlet to the balcony. Start by drilling a small hole through the wall near the outlet. Make sure the hole is big enough for the cable to pass through easily.
Once you've drilled the hole, carefully feed the cable through it. You may need to use a wire hanger or fish tape to help guide the cable through the wall cavity.
On the balcony, use cable clips or conduit to secure the cable along the railing or wall. Make sure the cable is kept away from any sharp edges or areas where it could be damaged.
Step 5: Make the Connections
Once the cable is routed and secured, it's time to make the connections. Start by stripping about 1/2 inch of insulation from the ends of the cable. You should see two or three wires: a black (hot) wire, a white (neutral) wire, and sometimes a green or bare copper (ground) wire.
Connect the black wire to the brass terminal on the outlet or device you're installing. Connect the white wire to the silver terminal, and the ground wire to the green terminal (if available). Use a screwdriver to tighten the screws and ensure a secure connection.
Once the connections are made, wrap each one with electrical tape to insulate them and protect them from the elements.
Step 6: Test the Installation
Before you turn the power back on, double-check all the connections to make sure they're secure and properly insulated. Once you're satisfied, turn the power back on at the circuit breaker.
Use a voltage tester to test the outlet or device you've installed. If everything is working properly, you should see a reading on the tester.
Step 7: Finishing Touches
Once the installation is tested and working, you can add any finishing touches. This might include covering the cable with a decorative cover or conduit to make it look more presentable.
Tips and Tricks
- Use weatherproof boxes: If you're installing an outlet on the balcony, use a weatherproof box to protect it from the elements.
- Plan for future expansion: If you think you might want to add more devices or lighting in the future, consider running a larger cable or installing additional outlets.
- Follow local electrical codes: Make sure you're following all local electrical codes and regulations. If you're not comfortable doing the installation yourself, it's always a good idea to hire a licensed electrician.
Conclusion
Installing outdoor electrical cables on a balcony can be a rewarding project that adds functionality and convenience to your outdoor space. By following these steps and using high-quality materials like our XLPE insulation outdoor cables, you can ensure a safe and reliable installation.
If you have any questions or need help choosing the right cable for your project, don't hesitate to reach out. We're here to help you make the most of your outdoor electrical setup. Contact us today to discuss your requirements and start your project on the right foot.
References
- National Electrical Code (NEC)
- Manufacturer's instructions for outdoor electrical cables