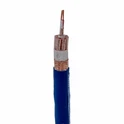
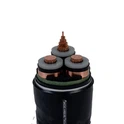
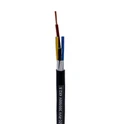
Installing PVC lighting control cables in a cable duct is a crucial process that requires careful planning and execution. As a PVC Lighting Control Cable supplier, I have witnessed firsthand the importance of proper installation to ensure the efficient and safe operation of lighting systems. In this blog post, I will guide you through the step-by-step process of installing PVC lighting control cables in a cable duct, providing valuable insights and tips along the way.
Step 1: Planning and Preparation
Before you start the installation process, it is essential to plan and prepare thoroughly. Here are some key steps to consider:
- Assess the Requirements: Determine the specific requirements of your lighting control system, including the number of cables, cable size, and the layout of the cable duct. This will help you ensure that you have the right materials and equipment for the job.
- Select the Right Cables: Choose high-quality PVC lighting control cables that are suitable for your application. Consider factors such as voltage rating, current capacity, and environmental conditions. Lighting Control Cable 2.5 Sy Cable is a popular choice for many lighting control systems due to its excellent performance and reliability.
- Gather the Necessary Tools and Materials: Collect all the tools and materials you will need for the installation, including cable cutters, cable pullers, cable ties, and electrical tape. Make sure you have everything on hand before you start the installation to avoid delays.
- Inspect the Cable Duct: Check the cable duct for any damage or obstructions. Ensure that the duct is clean and free from debris to prevent damage to the cables during installation.
Step 2: Measuring and Cutting the Cables
Once you have completed the planning and preparation phase, it's time to measure and cut the cables. Follow these steps:


- Measure the Cable Length: Use a measuring tape to determine the length of cable required for each run. Add a few extra inches to allow for any bends or connections.
- Cut the Cables: Use cable cutters to cut the cables to the desired length. Make sure the cuts are clean and straight to ensure proper connections.
- Label the Cables: To avoid confusion during installation, label each cable with its destination or function. This will make it easier to identify and connect the cables later.
Step 3: Pulling the Cables through the Duct
After cutting the cables, the next step is to pull them through the cable duct. Here's how to do it:
- Lubricate the Cables: Apply a lubricant to the cables to reduce friction and make it easier to pull them through the duct. This will also help prevent damage to the cables.
- Use a Cable Puller: Attach a cable puller to the end of the cable and use it to pull the cable through the duct. Make sure to pull the cable slowly and steadily to avoid kinking or damaging it.
- Guide the Cables: As the cable is being pulled through the duct, use a guide wire or a fish tape to help guide it around bends and corners. This will ensure that the cable is installed smoothly and without any obstructions.
Step 4: Connecting the Cables
Once the cables are pulled through the duct, it's time to connect them to the lighting control system. Here are the steps to follow:
- Strip the Cable Ends: Use a cable stripper to remove the insulation from the ends of the cables. Make sure to strip the insulation to the appropriate length for the connectors.
- Connect the Cables: Connect the cables to the appropriate terminals or connectors in the lighting control system. Follow the manufacturer's instructions for proper connection techniques.
- Secure the Connections: Use cable ties or electrical tape to secure the connections and prevent them from coming loose. Make sure the connections are tight and secure to ensure proper electrical conductivity.
Step 5: Testing the System
After connecting the cables, it's important to test the lighting control system to ensure that it is working properly. Here's how to do it:
- Power On the System: Turn on the power to the lighting control system and check if the lights are working. If any lights are not working, check the connections and the cables for any issues.
- Test the Controls: Use the lighting control system to test the different functions and settings. Make sure that the controls are working properly and that the lights can be adjusted as needed.
- Check for Grounding: Check the grounding of the lighting control system to ensure that it is safe. A proper grounding system helps prevent electrical shocks and reduces the risk of fire.
Step 6: Securing and Protecting the Cables
Once the system is tested and working properly, the final step is to secure and protect the cables. Here are some tips:
- Use Cable Clamps: Use cable clamps to secure the cables to the duct or the mounting surface. This will prevent the cables from moving or vibrating, which can cause damage over time.
- Install Cable Protection: Install cable protection such as conduit or cable trays to protect the cables from physical damage and environmental factors. This will help extend the lifespan of the cables and ensure their reliable operation.
- Label the Cables Again: Label the cables again to indicate their function and destination. This will make it easier to identify and troubleshoot the cables in the future.
Conclusion
Installing PVC lighting control cables in a cable duct is a complex but essential process for any lighting control system. By following the steps outlined in this blog post, you can ensure that the cables are installed correctly, safely, and efficiently. As a PVC Lighting Control Cable supplier, I am committed to providing high-quality products and expert advice to help you with your lighting control needs. If you have any questions or need further assistance, please feel free to contact us to discuss your requirements and explore how our products can meet your needs.
References
- Electrical Wiring Handbook, by Mike Holt
- National Electrical Code (NEC), by the National Fire Protection Association (NFPA)