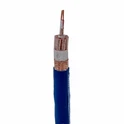
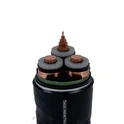
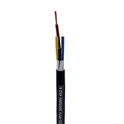
Hey there! I'm an underground electrical wire supplier, and I've been getting a bunch of questions lately about installing underground electrical wire in desert areas. So, I thought I'd share some tips and tricks based on my experience.
First things first, let's talk about the challenges of working in a desert. The extreme heat, dryness, and sandy soil can all pose problems when it comes to installing underground electrical wire. The high temperatures can cause the wire to expand and contract, which can lead to damage over time. The dryness can also make the soil more prone to cracking, which can expose the wire and increase the risk of electrical shock. And the sandy soil can be difficult to dig through, which can make the installation process more time-consuming and labor-intensive.
But don't worry, with the right preparation and equipment, you can overcome these challenges and install underground electrical wire in a desert area safely and effectively. Here's a step-by-step guide to help you get started:
Step 1: Plan Your Installation
Before you start digging, it's important to plan your installation carefully. This includes determining the route of the wire, the depth at which it will be buried, and the type of wire you will need. You should also check with your local utility company to make sure you are following all the necessary codes and regulations.
When planning the route of the wire, try to avoid areas with heavy foot traffic, vehicle traffic, or other potential sources of damage. You should also consider the location of any existing underground utilities, such as water pipes or gas lines, to avoid accidentally hitting them during the installation process.
The depth at which the wire will be buried will depend on a variety of factors, including the type of wire you are using, the local climate, and the soil conditions. In general, it's recommended that underground electrical wire be buried at least 18 inches deep to protect it from damage. However, in areas with extreme temperatures or heavy rainfall, you may need to bury the wire deeper to ensure its safety.
When choosing the type of wire to use, it's important to select a wire that is specifically designed for underground use. This type of wire is typically coated with a protective layer to prevent damage from moisture, chemicals, and other environmental factors. Some common types of underground electrical wire include 2.0 Awg Copper Underground Wire and 6/3 with Ground Direct Burial Wire.
Step 2: Gather Your Tools and Materials
Once you have planned your installation, it's time to gather the tools and materials you will need. This includes a shovel, a post-hole digger, a tape measure, a wire cutter, a wire stripper, and a voltage tester. You will also need to purchase the appropriate type and amount of underground electrical wire, as well as any connectors, splices, or other accessories you may need.
When purchasing your wire, make sure to buy it from a reputable supplier to ensure its quality and safety. You should also check the wire for any signs of damage or wear before installing it.
Step 3: Dig the Trench
Now it's time to start digging the trench. Use a shovel or a post-hole digger to dig a trench along the planned route of the wire. The width of the trench should be at least 6 inches wider than the diameter of the wire to allow for easy installation.
As you dig the trench, be careful not to damage any existing underground utilities. If you encounter any obstacles, such as rocks or roots, you may need to use a pickaxe or a saw to remove them.
Once you have dug the trench to the appropriate depth, use a tape measure to check the depth and width of the trench to make sure it meets the requirements of your installation.
Step 4: Install the Wire
Now that the trench is dug, it's time to install the wire. Start by unrolling the wire along the bottom of the trench. Make sure the wire is straight and free of any kinks or twists.


Next, use a wire cutter to cut the wire to the appropriate length. Leave a few extra inches of wire at each end to allow for connections.
Once the wire is cut to length, use a wire stripper to remove the insulation from the ends of the wire. Be careful not to damage the wire strands while stripping the insulation.
Now it's time to make the connections. Use the appropriate connectors or splices to connect the wire to the electrical panel or other devices. Make sure the connections are tight and secure to prevent any electrical problems.
After the connections are made, use a voltage tester to check the wire for any electrical current. If the voltage tester indicates that there is electrical current present, do not proceed with the installation until the problem is resolved.
Step 5: Backfill the Trench
Once the wire is installed and the connections are made, it's time to backfill the trench. Use the soil that you removed from the trench to fill it in. Make sure to pack the soil tightly around the wire to prevent any air pockets or gaps.
As you backfill the trench, be careful not to damage the wire. If you need to use a compactor or a tamper to pack the soil, make sure to do so gently to avoid damaging the wire.
Step 6: Test the System
After the trench is backfilled, it's time to test the system. Turn on the power to the electrical panel and use a voltage tester to check the wire for any electrical current. If the voltage tester indicates that there is electrical current present, the system is working properly.
If the voltage tester indicates that there is no electrical current present, there may be a problem with the installation. Check the connections and the wire for any damage or loose connections. If you are unable to find the problem, you may need to call a professional electrician to help you troubleshoot the system.
Step 7: Maintain the System
Once the system is installed and tested, it's important to maintain it regularly to ensure its safety and reliability. This includes checking the wire for any signs of damage or wear, testing the system periodically to make sure it is working properly, and replacing any damaged or worn components as needed.
In addition, you should also be aware of any changes in the local climate or soil conditions that may affect the performance of the system. If you notice any problems or changes, you should take appropriate action to address them as soon as possible.
Conclusion
Installing underground electrical wire in a desert area can be a challenging but rewarding project. By following these steps and using the right tools and materials, you can install underground electrical wire in a desert area safely and effectively.
If you have any questions or need further assistance with your installation, please don't hesitate to contact me. I'm here to help you every step of the way. And if you're in the market for high-quality underground electrical wire, be sure to check out our 2.0 Awg Copper Underground Wire and 6/3 with Ground Direct Burial Wire. We offer a wide range of products to meet your needs and budget.
Thanks for reading!
References
- National Electrical Code (NEC)
- Local building codes and regulations
- Manufacturer's instructions and recommendations