Installing armoured cable in a substation is a crucial task that requires careful planning, the right tools, and a good understanding of safety protocols. As an armoured cable supplier, I've seen firsthand how important it is to get this process right. In this blog, I'll walk you through the steps of installing armoured cable in a substation, sharing some tips and tricks along the way.
Step 1: Planning and Preparation
Before you even start thinking about installing the cable, you need to do some thorough planning. First, assess the substation layout. Figure out where the cable needs to go, taking into account any existing equipment, conduits, and potential obstacles. You'll also need to determine the length of cable required. Make sure to measure twice and cut once – or in this case, order once. It's better to have a little extra cable than to come up short.
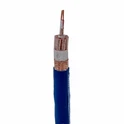
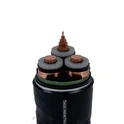
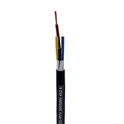
Next, select the right type of armoured cable for the job. We offer a variety of options, like the Yjv32 3* 50mm Armoured Cable, which is great for many substation applications. It's designed to handle high voltages and has a strong steel wire armour for protection. The Yjv32 Power Electrical Cable Amourd is another popular choice, offering reliable performance in various conditions. And if you need a cable for low - voltage applications, our 4 Core Low Voltage Power Cable might be just what you're looking for.
Gather all the necessary tools and equipment. You'll need cable cutters, crimping tools, insulation testers, and safety gear like gloves and safety glasses. Make sure everything is in good working condition before you start.


Step 2: Cable Installation
Once you've got your plan and your cable, it's time to start the installation. Begin by laying out the cable along the planned route. Be careful not to kink or damage the cable during this process. If you're running the cable through conduits, use a fish tape to pull it through. This can be a bit tricky, especially if the conduit has bends, but with a little patience, you can get it done.
When you reach the connection points, it's time to terminate the cable. First, strip the outer armour and insulation carefully. Use your cable cutters to make clean cuts. Then, expose the conductors and prepare them for connection. Make sure to follow the manufacturer's instructions for proper termination. You'll typically use crimping or soldering techniques to connect the conductors to the terminals.
After terminating the cable, it's important to test the connection. Use an insulation tester to check for any short circuits or insulation breakdowns. This step is crucial for ensuring the safety and reliability of the electrical system.
Step 3: Securing the Cable
Once the cable is installed and terminated, you need to secure it properly. Use cable clamps or brackets to hold the cable in place. This will prevent it from moving around and potentially causing damage. Make sure the clamps are tightened just enough – you don't want to over - tighten and damage the cable.
If the cable is running in an area where it might be exposed to mechanical damage, consider adding additional protection. You can use cable trays or conduit to shield the cable from impacts.
Step 4: Safety Checks
Before energizing the substation, conduct a final safety check. Double - check all the connections to make sure they are tight and secure. Look for any signs of damage or wear on the cable. Make sure all the safety gear is in place and that the area is clear of any debris.
It's also a good idea to have a second person review your work. Another set of eyes can often catch things you might have missed.
Step 5: Commissioning
Once you're satisfied with the installation and safety checks, it's time to commission the cable. This involves gradually applying power to the system and monitoring the performance. Start with a low voltage and gradually increase it to the rated voltage. Keep an eye on the electrical parameters like current, voltage, and temperature. If everything looks good, the cable is ready to go.
Tips and Tricks
- Label everything: Label the cable at both ends and at any intermediate points. This will make it easier to identify and troubleshoot in the future.
- Keep it clean: Keep the work area clean during the installation process. Dirt and debris can cause problems with the cable connections.
- Follow the codes: Make sure you're following all the relevant electrical codes and standards. This is not only important for safety but also for compliance.
Conclusion
Installing armoured cable in a substation is a complex but rewarding task. By following these steps and using the right cable, you can ensure a safe and reliable electrical system. As an armoured cable supplier, we're here to help you every step of the way. If you have any questions about our products or need advice on cable installation, don't hesitate to get in touch. We're always happy to assist with your procurement needs and help you find the best solutions for your substation projects.
References
- Electrical Installation Handbook, Schneider Electric
- National Electrical Code (NEC), National Fire Protection Association