Installing control wires in a sub-panel is a crucial task that requires careful planning, precision, and adherence to safety standards. As a Control Wire supplier, I've witnessed firsthand the importance of proper installation for the efficient and safe operation of electrical systems. In this blog post, I'll guide you through the step-by-step process of installing control wires in a sub-panel, sharing insights and best practices along the way.
Step 1: Gather the Necessary Tools and Materials
Before you begin the installation process, it's essential to gather all the tools and materials you'll need. Here's a list of the basic items:
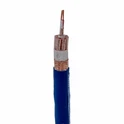
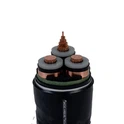
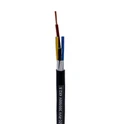
- Control Wires: Choose the appropriate type of control wires for your application. As a supplier, we offer a wide range of options, including Control Panel Wire, PVC Lighting Control Cable, and PVC Insulated Control Cable.
- Sub-Panel: Ensure that the sub-panel is suitable for your electrical load and meets all local electrical codes.
- Wire Strippers: Used to remove the insulation from the ends of the control wires.
- Screwdrivers: Both flathead and Phillips head screwdrivers will be needed for various tasks, such as opening the sub-panel and securing wire connectors.
- Wire Connectors: These are used to join the control wires together or to connect them to the terminals in the sub-panel.
- Electrical Tape: Used to insulate and protect the wire connections.
- Voltage Tester: To verify that the power is off before working on the sub-panel.
Step 2: Turn Off the Power
Safety should always be your top priority when working with electrical systems. Before you start installing the control wires, turn off the power to the sub-panel at the main breaker panel. Use a voltage tester to double-check that there is no electrical current present in the sub-panel. This will prevent the risk of electric shock and ensure a safe working environment.
Step 3: Plan the Wire Routing
Proper wire routing is essential for the efficient operation of the sub-panel and to prevent interference between different circuits. Start by identifying the location of the devices or equipment that will be connected to the sub-panel. Then, plan the path for the control wires, keeping them away from heat sources, moving parts, and other potential hazards. Use cable trays, conduit, or wire looms to organize and protect the wires.
Step 4: Install the Sub-Panel
If the sub-panel is not already installed, follow the manufacturer's instructions to mount it securely on a wall or other suitable surface. Make sure that the sub-panel is level and that there is enough space around it for easy access and maintenance. Connect the sub-panel to the main electrical supply using the appropriate size of feeder wires and follow all local electrical codes.
Step 5: Prepare the Control Wires
Once the sub-panel is installed, it's time to prepare the control wires for installation. Start by measuring and cutting the wires to the appropriate length, leaving some extra length for flexibility. Use wire strippers to remove about 3/4 inch of insulation from the ends of the wires. Be careful not to damage the conductors while stripping the insulation.


Step 6: Connect the Control Wires to the Sub-Panel
There are several ways to connect the control wires to the sub-panel, depending on the type of terminals and wire connectors used. Here are the most common methods:
- Screw Terminals: Many sub-panels have screw terminals for connecting the control wires. Simply insert the stripped end of the wire into the terminal and tighten the screw to secure it. Make sure that the wire is firmly connected and that there is no loose or exposed conductor.
- Push-In Terminals: Some sub-panels use push-in terminals, which are quick and easy to use. Insert the stripped end of the wire into the terminal until it clicks into place. To remove the wire, use a small screwdriver or a release tool to depress the locking mechanism.
- Wire Nuts: Wire nuts are a popular choice for joining multiple control wires together. Simply twist the stripped ends of the wires together and then screw on a wire nut until it is tight. Make sure that the wire nut is the appropriate size for the number and gauge of the wires being connected.
Step 7: Secure the Wires
After connecting the control wires to the sub-panel, use cable ties or other fasteners to secure the wires in place. This will prevent them from moving or becoming loose over time, which could cause electrical problems or pose a safety hazard. Make sure that the wires are not pinched or damaged during the installation process.
Step 8: Insulate the Wire Connections
To prevent electrical shorts and protect the wire connections from moisture and other environmental factors, use electrical tape to insulate the connections. Wrap the tape tightly around the connection, starting about 1/2 inch from the end of the insulation on each wire. Make sure that the tape covers the entire connection and extends a short distance onto the insulation of each wire.
Step 9: Test the System
Once all the control wires are installed and connected, it's time to test the system to ensure that it is working properly. Turn on the power to the sub-panel at the main breaker panel and use a voltage tester to verify that there is power present in the sub-panel. Then, test each circuit by turning on the devices or equipment that are connected to the sub-panel. Check for any signs of electrical problems, such as flickering lights, buzzing sounds, or tripped breakers. If you encounter any issues, turn off the power immediately and troubleshoot the problem.
Step 10: Label the Circuits
To make it easier to identify and troubleshoot the circuits in the sub-panel, label each circuit using a permanent marker or a label maker. Include the name or description of the device or equipment that is connected to the circuit, as well as the amperage rating of the breaker. This will help you to quickly locate and isolate any problems that may arise in the future.
Conclusion
Installing control wires in a sub-panel is a complex but rewarding task that requires careful planning, precision, and attention to detail. By following the steps outlined in this blog post and adhering to all local electrical codes, you can ensure that your sub-panel is installed safely and correctly. As a Control Wire supplier, we are committed to providing high-quality products and expert advice to help you with your electrical projects. If you have any questions or need further assistance, please don't hesitate to contact us. We look forward to working with you and helping you to achieve your electrical goals.
References
- National Electrical Code (NEC)
- Manufacturer's instructions for the sub-panel and control wires
- Electrical safety guidelines and best practices