Installing electrical wire in a shed can be a rewarding DIY project that adds functionality and convenience to your outdoor space. As an electrical wire supplier, I've seen firsthand the importance of proper installation to ensure safety and efficiency. In this blog post, I'll guide you through the process of installing electrical wire in a shed, from planning and preparation to the actual installation steps.
Planning Your Electrical System
Before you start installing electrical wire in your shed, it's essential to plan your electrical system carefully. Consider the following factors:
- Power Requirements: Determine the electrical devices and appliances you want to use in your shed, such as lights, outlets, and power tools. Calculate the total wattage of these devices to determine the size of the electrical service you'll need.
- Layout: Plan the layout of your electrical system, including the location of outlets, switches, and lights. Consider the placement of furniture and equipment in your shed to ensure that outlets are easily accessible.
- Code Requirements: Check your local electrical codes and regulations to ensure that your installation complies with safety standards. This may include requirements for grounding, wiring methods, and the use of approved materials.
Gathering Materials and Tools
Once you've planned your electrical system, it's time to gather the materials and tools you'll need for the installation. Here's a list of essential items:
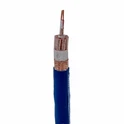
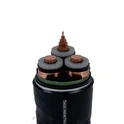
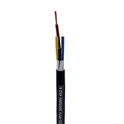
- Electrical Wire: Choose the appropriate type and size of electrical wire for your installation. For most shed applications, Cross Linked Polyethylene Wire or Household Wire is a good choice. Make sure to select wire that is rated for the voltage and amperage of your electrical system.
- Conduit: Conduit is a protective pipe that encloses electrical wire to prevent damage and provide a safe path for the wire. You can choose from different types of conduit, such as PVC, metal, or flexible conduit, depending on your installation requirements.
- Outlets and Switches: Select electrical outlets and switches that are suitable for your shed environment. Consider using weather-resistant outlets and switches if your shed is exposed to the elements.
- Junction Boxes: Junction boxes are used to connect electrical wires and provide a safe and accessible location for electrical connections. Make sure to use junction boxes that are rated for the size and number of wires you'll be connecting.
- Tools: You'll need a variety of tools for the installation, including a drill, screwdriver, wire strippers, pliers, and a voltage tester. Make sure to use tools that are appropriate for the type of electrical work you'll be doing.
Preparing the Shed
Before you start installing electrical wire in your shed, you'll need to prepare the shed for the installation. Here are the steps to follow:
- Turn Off the Power: Before you start any electrical work, make sure to turn off the power to the shed at the main electrical panel. This will prevent electrical shock and ensure your safety.
- Mark the Location of Outlets and Switches: Use a pencil or marker to mark the location of outlets, switches, and junction boxes on the walls and ceiling of your shed. Make sure to measure and mark the locations accurately to ensure that the electrical components are installed in the correct position.
- Drill Holes for Conduit and Wires: Use a drill to create holes in the walls and ceiling of your shed for the conduit and wires. Make sure to drill the holes at the appropriate locations and angles to ensure that the conduit and wires can be installed easily.
- Install Conduit: Install the conduit in the holes you drilled in the walls and ceiling of your shed. Use conduit connectors and straps to secure the conduit in place. Make sure to run the conduit in a straight line and avoid sharp bends or kinks.
Installing Electrical Wire
Once you've prepared the shed and installed the conduit, it's time to install the electrical wire. Here are the steps to follow:


- Run the Wire Through the Conduit: Feed the electrical wire through the conduit, starting at the main electrical panel and ending at the outlets, switches, and junction boxes in your shed. Make sure to leave enough slack in the wire at each location to allow for easy connection.
- Connect the Wire to the Outlets and Switches: Use wire strippers to remove the insulation from the ends of the electrical wire. Connect the wire to the outlets and switches using the appropriate terminals or connectors. Make sure to tighten the terminals or connectors securely to ensure a good electrical connection.
- Connect the Wire to the Junction Boxes: Connect the electrical wire to the junction boxes using the appropriate terminals or connectors. Make sure to follow the wiring diagram and connect the wires correctly to avoid short circuits or electrical problems.
- Test the Electrical System: Once you've installed the electrical wire and connected the outlets, switches, and junction boxes, it's time to test the electrical system. Turn on the power to the shed at the main electrical panel and use a voltage tester to check for the presence of electricity at each outlet and switch. Make sure to test the electrical system thoroughly to ensure that it is working properly.
Finishing the Installation
After you've tested the electrical system and ensured that it is working properly, it's time to finish the installation. Here are the steps to follow:
- Install Outlet Covers and Switch Plates: Install outlet covers and switch plates over the outlets and switches to protect them from dust, dirt, and moisture. Make sure to choose outlet covers and switch plates that are suitable for your shed environment.
- Secure the Conduit and Wires: Use conduit straps and wire ties to secure the conduit and wires in place. Make sure to keep the conduit and wires organized and tidy to prevent damage and ensure a professional-looking installation.
- Clean Up the Work Area: Clean up the work area and remove any debris or tools. Make sure to dispose of any waste materials properly.
Conclusion
Installing electrical wire in a shed can be a challenging but rewarding DIY project. By following the steps outlined in this blog post and using the appropriate materials and tools, you can install an electrical system in your shed that is safe, efficient, and reliable. As an electrical wire supplier, I'm here to help you with all your electrical wire needs. If you have any questions or need assistance with your installation, please don't hesitate to contact us for more information. We're here to help you make your shed a functional and convenient space.
References
- National Electrical Code (NEC)
- Local Electrical Codes and Regulations
- Electrical Wiring Installation Manuals
- Manufacturer's Instructions for Electrical Components