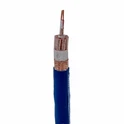
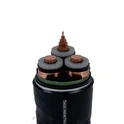
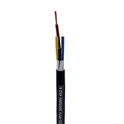
Hey there! As a supplier of Low Voltage YJV Cable, I've got a fair bit of knowledge and experience when it comes to installing these cables, especially in coastal areas. Coastal areas present some unique challenges due to the high humidity, saltwater exposure, and potential for extreme weather conditions. But don't worry, I'm here to break down the steps and share some tips to make your installation process smooth and successful.
Understanding the Challenges in Coastal Areas
First off, let's talk about what makes coastal areas so tricky for cable installation. The salt in the air and water can corrode the cable's outer sheath and conductors over time. High humidity can also lead to moisture ingress, which can damage the insulation and reduce the cable's performance. And let's not forget about the strong winds and storms that are common in coastal regions, which can physically damage the cables.
To combat these issues, it's crucial to choose the right type of Low Voltage YJV Cable. For example, Copper Conductor YJV Cable is a great option as copper is a highly conductive and corrosion-resistant material. It can withstand the harsh coastal environment better than some other conductors.
Pre - installation Preparation
Before you start installing the cable, you need to do some groundwork. First, conduct a thorough site survey. This involves checking the terrain, identifying any potential obstacles like rocks, roots, or existing underground utilities. In coastal areas, you also need to consider the water table level and the proximity to the sea.


Next, gather all the necessary tools and materials. You'll need cable cutters, crimping tools, cable pulling equipment, and of course, the 0.6 - 1kv YJV Cable itself. Make sure all your tools are in good working condition and that you have enough materials for the entire installation.
Cable Trenching
Once you've completed the preparation, it's time to start trenching. The depth of the trench is crucial. In general, for Low Voltage YJV Cable, the trench should be at least 0.7 meters deep. This helps protect the cable from physical damage and reduces the risk of moisture ingress.
When digging the trench in a coastal area, you need to be extra careful. The soil may be sandy or soft, which can make it prone to collapse. Consider using trench shoring to support the sides of the trench and prevent it from caving in.
Cable Installation
Now comes the main part - installing the cable. Start by laying the cable in the trench carefully. Avoid sharp bends or kinks in the cable, as this can damage the insulation and conductors. You can use cable rollers to guide the cable into the trench smoothly.
If you're installing a long cable run, you may need to use cable pulling equipment. Make sure to follow the manufacturer's instructions for the pulling force to avoid over - stressing the cable.
Jointing and Termination
After the cable is laid in the trench, you'll need to make joints and terminations. This is a critical step, as poorly made joints can lead to electrical failures. Use high - quality jointing and termination kits that are suitable for the coastal environment.
When making joints in a coastal area, pay extra attention to sealing. Use waterproof and corrosion - resistant sealants to prevent moisture and salt from entering the joint.
Backfilling and Protection
Once the joints and terminations are complete, it's time to backfill the trench. Use clean, free - from - debris soil to backfill the trench. Compact the soil gently to avoid damaging the cable.
To provide additional protection, you can lay a layer of sand or a protective mat over the cable before backfilling. This helps cushion the cable and reduces the risk of damage from rocks or other sharp objects in the soil.
Testing and Commissioning
After the installation is complete, it's essential to test the cable. Conduct insulation resistance tests, continuity tests, and other relevant electrical tests to ensure the cable is functioning properly.
Once the tests are passed, you can commission the cable and start using it. But don't forget to conduct regular inspections, especially in a coastal area. Check for signs of corrosion, moisture ingress, or physical damage.
Tips for Coastal Cable Installation
- Use Corrosion - Resistant Materials: As mentioned earlier, choose cables and accessories made from corrosion - resistant materials. This can significantly extend the lifespan of the cable.
- Proper Sealing: Ensure all joints, terminations, and cable entry points are properly sealed to prevent moisture and salt from entering.
- Elevated Mounting: If possible, mount the cable on elevated structures to reduce the risk of flooding and saltwater exposure.
Conclusion
Installing Low Voltage YJV Cable in coastal areas can be challenging, but with the right approach and the right products, it can be done successfully. By choosing high - quality cables like 16mm 4 Core Xlpe Cable, following proper installation procedures, and taking extra precautions against the coastal environment, you can ensure a reliable and long - lasting cable installation.
If you're in the market for Low Voltage YJV Cable or need more advice on installation, feel free to reach out. I'm always happy to help you with your cable needs and discuss potential purchasing options.
References
- Electrical Installation Handbook, various editions
- Manufacturer's guidelines for Low Voltage YJV Cable