Hey there! As a supplier of Mains Armoured Cable, I've seen firsthand the importance of getting the installation right. It's not just about hooking up some wires; it's about ensuring safety, efficiency, and long - term performance. So, let's dive into how to install Mains Armoured Cable correctly.
1. Preparation
Before you even start unrolling that cable, you've got to do some groundwork. First off, make sure you've got all the right tools. You'll need cable cutters, a wire stripper, a drill (if you're going to be mounting anything), and some cable glands. These glands are super important as they provide a secure connection between the cable and the equipment, and they also help keep out dust and moisture.
Next, take a good look at the installation area. You need to plan the route for the cable. Avoid areas that are prone to high heat, mechanical damage, or chemical exposure. For example, don't run the cable near a furnace or in a place where heavy machinery might roll over it.
Also, check the local electrical codes. These codes are there for a reason - to keep you and everyone around you safe. Make sure your installation complies with all the relevant regulations.
2. Selecting the Right Cable
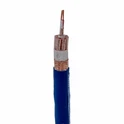
Not all Mains Armoured Cables are created equal. You've got to pick the one that suits your needs. For instance, if you're looking for a specific type, we offer the Yjv32 3* 50mm Armoured Cable. This cable is great for a variety of applications, thanks to its robust construction and reliable performance.
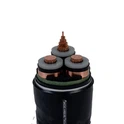
If you need a cable with three cores for power transmission, our Armoured 3 Core Power Cable is a top - notch choice. It's designed to handle the demands of power distribution efficiently.
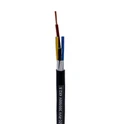
And for applications that require a cable rated for 600 - 1000 volts, the 600 1000v Armoured Cable is what you're looking for. It provides the right amount of voltage capacity and protection.
3. Unrolling and Laying the Cable
Once you've got the right cable, it's time to start unrolling it. Do it carefully to avoid kinks or twists. A kinked cable can cause electrical problems and reduce its lifespan.
When laying the cable, use cable supports at regular intervals. This helps keep the cable in place and prevents it from sagging. The spacing of the supports depends on the type and size of the cable, but as a general rule, you don't want the cable to be hanging loose.
If you're running the cable through walls or floors, use conduit or cable trays. These provide additional protection and make it easier to manage the cable.
4. Termination
Termination is a critical step in the installation process. First, strip the outer sheath of the cable carefully. Use your wire stripper to remove just the right amount of insulation. Be careful not to damage the inner conductors.
Next, connect the conductors to the appropriate terminals. Make sure the connections are tight. Loose connections can lead to overheating and electrical fires. Use a torque wrench to ensure you're applying the correct amount of force when tightening the terminals.
After connecting the conductors, install the cable glands. The glands should be tightened properly to create a seal. This helps prevent moisture and dirt from getting into the cable and causing problems.
5. Testing
Once the installation is complete, it's time to test the cable. Use a multimeter to check for continuity and insulation resistance. Continuity ensures that the electrical current can flow through the cable without any breaks. Insulation resistance measures how well the insulation is protecting the conductors.
If the test results are not within the acceptable range, you need to go back and check your connections. It could be a loose terminal, damaged insulation, or a problem with the cable itself.
6. Maintenance
Even after a successful installation, you can't just forget about the cable. Regular maintenance is essential. Inspect the cable periodically for signs of wear and tear. Look for any damage to the outer sheath, loose connections, or signs of overheating.
If you notice any problems, address them immediately. Small issues can quickly turn into big problems if left unattended.


Why Choose Our Cables?
As a supplier, we take pride in offering high - quality Mains Armoured Cables. Our cables are made from the best materials and undergo rigorous testing to ensure they meet the highest standards.
We also provide excellent customer support. If you have any questions about installation, cable selection, or maintenance, our team of experts is always ready to help.
If you're in the market for Mains Armoured Cables, whether it's for a small DIY project or a large industrial installation, we've got you covered. We offer a wide range of cables to suit different needs and budgets.
So, if you're interested in purchasing our Mains Armoured Cables or have any questions about the installation process, don't hesitate to reach out. We're here to help you make the right choice and ensure a successful installation.
References
- Electrical Installation Handbook by Schneider Electric
- National Electrical Code (NEC)