Hey there! As an outdoor electrical cable supplier, I've seen firsthand how a well - installed electrical system can transform a deck into a cozy and functional outdoor space. Today, I'm gonna walk you through the process of installing outdoor electrical cables on a deck.
Planning Your Installation
Before you even start thinking about cables, you need to have a solid plan. First off, figure out what you want to power on your deck. Are you looking to install some string lights, a ceiling fan, or maybe a small outdoor fridge? Make a list of all the electrical devices you plan to use and note down their power requirements.
Once you have your list, decide where you want to place these devices. This will help you determine the best route for your cables. You'll want to keep the cables away from high - traffic areas and places where they could get damaged, like under furniture or near the edge of the deck where they might be stepped on.
It's also crucial to check your local building codes. Different areas have different regulations when it comes to outdoor electrical installations. You don't want to end up with a fine or, even worse, a dangerous electrical situation. Reach out to your local building department or do some online research to make sure you're in compliance.
Choosing the Right Cables
Now, let's talk about the cables themselves. At our company, we offer a variety of outdoor electrical cables that are perfect for deck installations.
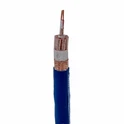
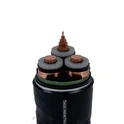
One great option is the Copper XLPE Insulated Armoured Cable. This cable has a copper conductor, which is known for its excellent conductivity. The XLPE insulation provides great protection against moisture, heat, and other environmental factors. The armoured design adds an extra layer of durability, making it suitable for outdoor use where the cable might be exposed to some rough handling.
Another option is the Xlpe Insulation Outdoor Electrical Cable. This cable is specifically designed for outdoor applications. The XLPE insulation ensures that the cable can withstand the elements, including rain, snow, and UV rays. It's a reliable choice for powering your deck lights and other small electrical devices.
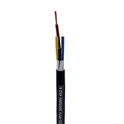
If you're looking for something with a bit more protection, the Xlpe Insulation PVC Out Sheath Cable is a good pick. The PVC outer sheath provides an additional barrier against physical damage and moisture. It's a great all - around cable for deck installations.
Preparing Your Tools and Materials
Once you've chosen your cables, it's time to gather your tools and materials. You'll need a few basic items:
- A utility knife for cutting the cables. Make sure it's sharp so you can get clean cuts.
- Wire strippers to remove the insulation from the ends of the cables.
- A drill with the appropriate bits for making holes in the deck for the cables.
- Cable staples or clips to secure the cables to the deck.
- An electrical junction box to connect the cables and protect the connections.
- A voltage tester to make sure the power is off before you start working and to test the connections when you're done.
Installing the Cables
Now, let's get to the actual installation. First, turn off the power at the main electrical panel. This is super important for your safety. Use a voltage tester to double - check that the power is off.
Next, start running the cables along the planned route. Use the drill to make holes in the deck where the cables need to pass through. Make sure the holes are big enough for the cables but not too large that the cables will move around.


Secure the cables to the deck using cable staples or clips. Make sure they're spaced evenly to keep the cables in place. Avoid pulling the cables too tight, as this can damage the insulation.
When you reach the location where you want to connect the cables, install the electrical junction box. Follow the manufacturer's instructions for wiring the cables inside the box. Make sure all the connections are tight and secure.
Once you've connected all the cables, use the voltage tester to check the connections. If everything is working properly, you can turn the power back on at the main electrical panel.
Testing and Maintenance
After you've installed the cables, it's time to test the electrical devices. Turn on each device one by one and make sure they're working as expected. If you notice any issues, like flickering lights or a device not turning on, turn off the power and check the connections again.
Regular maintenance is also important to keep your outdoor electrical system in good shape. Check the cables periodically for any signs of damage, like cuts or frayed insulation. If you find any problems, replace the damaged section of the cable immediately.
Conclusion
Installing outdoor electrical cables on a deck might seem like a daunting task, but with the right planning, the right cables, and the right tools, it's definitely doable. By following these steps, you can create a safe and functional outdoor electrical system for your deck.
If you're interested in purchasing high - quality outdoor electrical cables for your deck installation, we'd love to hear from you. Whether you have questions about our products, need help choosing the right cable, or want to discuss a bulk order, don't hesitate to reach out. We're here to assist you every step of the way.
References
- Electrical Wiring Handbook by Mike Holt
- National Electrical Code (NEC) publications