Securing household wire to studs is a fundamental aspect of electrical installations in residential buildings. As a trusted household wire supplier, I understand the importance of ensuring that wires are properly secured to studs for safety, efficiency, and compliance with electrical codes. In this blog post, I will share some practical tips and techniques on how to secure household wire to studs effectively.


Understanding the Basics
Before we delve into the process of securing household wire to studs, it's essential to understand the basic components involved. Household wires typically consist of a conductor (usually copper or aluminum) surrounded by an insulating material. The type of wire you choose depends on various factors, such as the electrical load, the location of the installation, and the local electrical codes.
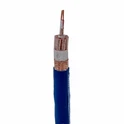
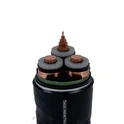
For most residential applications, Copper Core Polyethylene Insulated Cable is a popular choice due to its excellent conductivity and durability. This type of cable is suitable for both indoor and outdoor use and can withstand a wide range of environmental conditions.
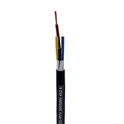
Another common option is Household Insulated Wire, which is available in different gauges and insulation materials. The insulation helps to protect the conductor from damage and prevent electrical shocks.
In some cases, 300/500V PVC Insulated Cable may be used for specific applications, such as lighting circuits or low-voltage electrical systems. PVC insulation provides good electrical insulation and is resistant to moisture and chemicals.
Tools and Materials Needed
To secure household wire to studs, you will need the following tools and materials:
- Wire Staples: These are used to fasten the wire to the studs. Make sure to choose staples that are the appropriate size for the wire gauge.
- Hammer or Staple Gun: You can use a hammer to drive the staples into the studs or a staple gun for a more efficient and consistent installation.
- Measuring Tape: This is used to measure the distance between the studs and ensure that the wire is installed at the correct height.
- Wire Cutters: These are used to cut the wire to the appropriate length.
- Electrical Tape: This is used to insulate the wire connections and prevent electrical shorts.
- Safety Gear: Wear safety glasses and gloves to protect yourself from injury.
Step-by-Step Guide
Now that you have the necessary tools and materials, let's walk through the step-by-step process of securing household wire to studs:
- Plan the Installation: Before you start installing the wire, it's important to plan the layout of the electrical system. Determine the location of the outlets, switches, and fixtures, and mark the position of the studs on the wall.
- Measure and Cut the Wire: Use a measuring tape to measure the length of the wire needed for each section of the installation. Cut the wire to the appropriate length using wire cutters.
- Secure the Wire to the Studs: Start by attaching the wire to the first stud using wire staples. Make sure to leave enough slack in the wire to allow for future adjustments. Drive the staples into the stud using a hammer or staple gun, making sure not to damage the wire insulation.
- Run the Wire Along the Studs: Once the wire is secured to the first stud, run it along the studs to the next location. Use additional staples to secure the wire at regular intervals, typically every 4 to 6 feet.
- Make the Connections: At each outlet, switch, or fixture location, make the necessary wire connections. Use electrical tape to insulate the connections and prevent electrical shorts.
- Test the Electrical System: Once the wire is installed and the connections are made, test the electrical system to ensure that it is working properly. Use a voltage tester to check for the presence of electricity and make any necessary adjustments.
Tips and Best Practices
Here are some additional tips and best practices to keep in mind when securing household wire to studs:
- Follow Electrical Codes: Make sure to follow all local electrical codes and regulations when installing the wire. This will help to ensure the safety of the electrical system and prevent any potential hazards.
- Use the Right Size Wire: Choose the appropriate wire gauge for the electrical load and the distance between the outlets, switches, and fixtures. Using the wrong size wire can lead to overheating and electrical fires.
- Avoid Overcrowding the Studs: Do not overcrowd the studs with too many wires. This can make it difficult to install the wire properly and can also increase the risk of electrical shorts.
- Protect the Wire from Damage: Make sure to protect the wire from damage during the installation process. Avoid bending or kinking the wire, and use cable protectors or conduit to shield the wire from sharp edges or other hazards.
- Label the Wires: Label the wires at each outlet, switch, and fixture location to make it easier to identify them in the future. This will also help to prevent any confusion when making repairs or modifications to the electrical system.
Conclusion
Securing household wire to studs is a critical step in any electrical installation. By following the tips and techniques outlined in this blog post, you can ensure that the wire is installed safely and securely, and that the electrical system functions properly. As a household wire supplier, I am committed to providing high-quality products and expert advice to help you with your electrical projects. If you have any questions or need further assistance, please feel free to contact me to discuss your procurement needs. I look forward to working with you to ensure the success of your electrical installation.
References
- National Electrical Code (NEC)
- Electrical Wiring Handbook
- Manufacturer's Instructions for Household Wire Products