Hey there! I'm a supplier of common house wire, and I've been in this business for quite some time. Today, I'm gonna share with you how to install common house wire in a mobile home. It might seem a bit daunting at first, but with the right guidance and some basic knowledge, you can do it like a pro.
Getting Started: Tools and Materials
Before you start the installation process, you need to gather all the necessary tools and materials. Here's a list of what you'll need:
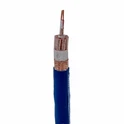
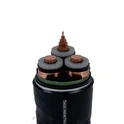
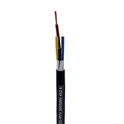
- Wire: Make sure you choose the right type of wire for your mobile home. You can check out Electrical Wire for House Lights and Household Insulated Wire on our website for more options.
- Wire Strippers: These are used to remove the insulation from the wire.
- Screwdrivers: Both flathead and Phillips head screwdrivers will come in handy.
- Pliers: For bending and cutting the wire.
- Electrical Tape: To insulate the connections.
- Junction Boxes: These are used to connect the wires safely.
- Fish Tape: If you need to run the wire through walls or ceilings.
Planning the Installation
The first step in any wiring project is to plan it out. You need to decide where you want to install the outlets, switches, and lights. Make a sketch of your mobile home and mark the locations of all the electrical fixtures. This will help you determine how much wire you need and where to run it.
It's also important to consider the electrical load of your mobile home. You don't want to overload the circuit, so make sure you calculate the total wattage of all the appliances and fixtures you'll be using. If you're not sure how to do this, you can consult an electrician.
Running the Wire
Once you have your plan in place, it's time to start running the wire. Here are the steps to follow:
- Drill Holes: Use a drill to make holes in the studs or joists where you want to run the wire. Make sure the holes are large enough to accommodate the wire and the fish tape.
- Run the Fish Tape: If you're running the wire through walls or ceilings, use the fish tape to guide the wire through the holes. Feed the fish tape through one hole and pull it out through the other. Then, attach the wire to the end of the fish tape and pull it through.
- Secure the Wire: Once the wire is in place, use cable staples to secure it to the studs or joists. Make sure the staples are not too tight, as this can damage the wire.
- Connect the Wires: At each junction box, connect the wires using wire nuts. Make sure you match the colors of the wires correctly. The black wire is usually the hot wire, the white wire is the neutral wire, and the green or bare wire is the ground wire.
- Insulate the Connections: After you've connected the wires, wrap them with electrical tape to insulate the connections.
Installing the Outlets and Switches
Once the wire is run, it's time to install the outlets and switches. Here's how to do it:


- Mount the Outlet or Switch Box: Use screws to mount the outlet or switch box to the wall or ceiling. Make sure the box is level and flush with the surface.
- Connect the Wires: Remove the cover plate from the outlet or switch and connect the wires to the terminals. Make sure you match the colors of the wires correctly.
- Install the Outlet or Switch: Once the wires are connected, install the outlet or switch in the box. Use screws to secure it in place.
- Test the Outlet or Switch: After you've installed the outlet or switch, test it to make sure it's working properly. Use a voltage tester to check for power.
Installing the Lights
Installing lights is similar to installing outlets and switches. Here are the steps to follow:
- Mount the Light Fixture: Use screws to mount the light fixture to the ceiling or wall. Make sure the fixture is level and secure.
- Connect the Wires: Remove the cover plate from the light fixture and connect the wires to the terminals. Make sure you match the colors of the wires correctly.
- Install the Bulb: Once the wires are connected, install the bulb in the light fixture.
Safety Precautions
Working with electricity can be dangerous, so it's important to take some safety precautions. Here are some tips to keep in mind:
- Turn off the Power: Before you start any wiring work, turn off the power at the breaker box. This will prevent you from getting electrocuted.
- Use Insulated Tools: Make sure all your tools are insulated to prevent electrical shock.
- Wear Protective Gear: Wear safety glasses and gloves to protect yourself from injury.
- Follow the Code: Make sure you follow all the electrical codes and regulations in your area. If you're not sure what these are, you can consult an electrician.
Conclusion
Installing common house wire in a mobile home is a doable project if you have the right tools, materials, and knowledge. By following the steps outlined in this blog post, you can safely and effectively wire your mobile home.
If you're in the market for high-quality common house wire, check out our Household Insulated Wire on our website. We offer a wide range of electrical wire products at competitive prices.
If you have any questions or need more information about wiring your mobile home, feel free to contact us. We're here to help you with all your electrical needs.
References
- Electrical Wiring Handbook
- National Electrical Code